Drawing for Clients

Our office uses a range of tools to communicate designs: technical drawings (colloquially “blueprints”) are the document we spend the most time with – but these are not particularly client-friendly documents.

As an office, we listen to and observe our clients’ reactions to how we present ideas so that we make sure we’re communicating visual information in a clear and accessible way. This can take the form of photo-realistic collages, carefully constructed 3D renderings with exact materials rendered, and virtual models which can be walked through. All have their place as means of communicating a design.

Among the most valuable design communication tools is the hand sketch. From a quick doodle done on the fly in the margins of a meeting agenda to a careful pen and marker or watercolor rendering, a quick sketch takes a few minutes to communicate volumes to a client, contractor or team member. These drawings are incredibly important in describing the scope of work to builders and other team members.

Below are examples of the progression of visualizations for a home renovation with additions in the historic preservation district of Bellport, New York. A photograph captures our first visit to the home, followed by an initial concept sketch, then a more photo-real collage, and finally a technical drawing.

Client home in Bellport, NY.
Photograph of client home taken at our initial visit.
Initial sketch of client's home with renovation and additions.
Doodle of ideas, done on the fly.
Detailed rendering of client's home.
Detailed rendering.
Technical drawing of client's home.
Technical drawing.

Vertically Combining Apartments (PHOTOS)

In our recent blog post “How to Vertically Connect Two Apartments,” we discussed the considerations and process for the vertical combination of two apartment units. It’s not always easy to visualize what that process looks like, so we’ve documented a recent vertical combination to show you what’s involved.

A probe of the ceiling looking for beams, pipes and ducts (we found all of these here).
Slab demolition.
Temporary shoring (brace) used to hold up floor while cutting and adding new beams.
Welding gear.
Scaffold used to place new beam.
Large bolted plate. The beam needed to be carried up tight pre-war stairs in sections that would fit into the building's narrow hallways, then bolted and welded on site.
Steel support.
Looking up into the opening with the new framing in place.
Intumescent paint fireproofing on steel brace to help keep walls thin.
Stair supports arrive in parts that are assembled on site.
Assembling steel stair components on site.
Steel frame of stair installed.
Cladding stair with wood and oak.
Panelling and finishes.
Installing brass balusters and oak rail.
Detail.

How to Vertically Connect Two Apartments

It’s the dream of many New York City apartment owners: the unit above or below you just came on the market, so you are thinking you can annex it and double your living space. Vertical combinations pose different – and more complicated – challenges than horizontal combinations. The challenges may seem daunting, but vertically combining two apartments is doable so long as you follow a process.

What’s Possible Under Your Building’s Rules

Before you actually purchase the new unit, you’ll need to work closely with your building management to arrive at a plan that works for both you and them. The first, and probably most important, thing you’ll want to know is what “intensity” of work your building will permit. Some buildings impose limitations based on anticipated duration, noise, or impact to other units. The process of management determining if you can do what you’d like is called a “conceptual review.” A vertical connection can be done in ways that are simple – popping through a floor slab only – or more complicated, requiring reframing of beams and rerouting building systems like pipes, electric wiring and mechanical systems. It’s important to know at this stage what your building will allow, because it will impact not only how your architect will design the connection, but whether you want to proceed with the project and the purchase. It’s also a good idea to work with the building during this process to uncover any existing structural and mechanical plans which can help your architect to identify a good location for a stair on both floors.

Sketches of the initial idea.

What’s Physically Possible

The next step is to understand what is physically possible. Using the plans and information from the conceptual review, work with your architect to find an arrangement which feels like the stair is in the exact place it should be without too many compromises. Ideally, the stair should be in a location that seems like it’s always been there. This is a substantial renovation, so the “easiest” place may not be the best place. For example, the easiest place physically to add a stair may mean that it terminates in a bedroom, but that isn’t ideal. Try for the best place, even if it means you have to renovate a little more to make it happen.

Once you’ve identified a good spot, ask a contractor do “probes” (cutting holes in the walls and ceilings) to look for beams, pipes, ducts, etc. This helps you and your architect understand what will need to be moved if the stair is located in that spot. There may be building systems that aren’t on original or previous sets of plans, so probes are critical to confirm what’s actually there. No one wants the costly surprise of finding out after the project has started that the HVAC needs to be moved.

A probe of the ceiling looking for beams, pipes and ducts (we found all of these here).

Next, ask your architect to create a sketch that shows the proposed location of the stair in both the original unit and the new unit. Even if you’ve conveyed verbally where the stair will go, a clear visual will eliminate any confusion or misunderstanding. Then submit this sketch to the building management – again – for approval. Once that’s received in writing, the project can then move to the engineering and architectural teams to turn the sketch into a reality.

Finished stair.

If you’re thinking about vertically combining two apartments, we can help. Contact us for an assessment of your options.

Having trouble visualizing the process of a vertical apartment combination? We’ve put together a photo essay to walk you through it.

Aging in Place: Considerations for Buying and Renovating

Ten thousand Baby Boomers turn 65 each day. In ten years, the senior population is expected to soar to over 36 million seniors, and by 2030, people older than 65 will outnumber children in the US. This means more people are thinking about where they will live when they retire than ever before in history.

“Aging-in-place” is the term for remaining in the home you currently live in as you get older, rather than relocating to a different home or an independent or managed care living facility. Reasons for aging-in-place can range from a basic aversion to moving to wanting to maintain the active lifestyle you currently have, even if it’s at a slightly slower pace. At the same time, the realities of potential issues that could arise as one ages need to be accounted for. Aging-in-place can be a viable option for many, if certain design and functionality goals are met. Below we outline some considerations and questions for making sure aging-in-place is an option for you.

Front Door/Entryway

When looking at the entrance to the home, try to imagine what it would be like to enter if you didn’t have full sight or complete mobility.

  • Is access to the front door negotiable by walker and/or wheelchair?
  • Is the door easy to open or can it be mechanized?
  • Is the door wide enough to accommodate a wheelchair?
  • Is there space in the entryway to stow a cane or walker without creating an obstacle?
  • Is the flooring slick or likely to become slick with rain or snow?
  • Is the flooring even? Are there variations in the levels (like a step up) that would need to be eliminated – or visually highlighted so that they are easier to see and navigate?

Bedroom

As people get older, sleeping patterns change. The ability to customize the environment is particularly important.

  • Can the bedroom be its own temperature zone so the heating and cooling can be adjusted without impacting other areas of the house?
  • Is the bedroom far enough away from the main living areas to allow for quiet sleeping during the day?
  • Can adjustable lighting, including blackout drapes, be installed?
  • Is there ample room to exit the bed and move around it, including in a wheelchair?
  • Is there room to accommodate different kinds of beds, seating or sleeping for caregivers, or medical equipment if needed?
  • Is the bedroom close to a bathroom, and is the path to the bathroom easy to navigate?

Bathroom

The bathroom is the room that most quickly comes to mind when thinking about accessibility. It’s also the room that presents the greatest opportunities for making changes now that will benefit you later on.

  • Is there a “roll-in” (no curb) shower, or could the current shower be replaced with one?
  • Could the tub be removed or replaced with a walk-in tub?
  • Are the toilet and sink usable by someone in a wheelchair? Adjustable height vanities can provide workable solutions for now and in the future.
  • Are the sink faucets and shower controls equipped with anti-scald fixtures to prevent accidental burning?
  • Could grab bars be easily added around the bathroom?
  • Is the lighting sufficient for navigating as well as for reading product and prescription labels?

Kitchen

Even kitchens with small footprints can work for aging in place if you have the right elements.

  • As in other rooms, flooring should be anti-glare. Because there are likely to be spills, flooring shouldn’t become slick when wet and it should be easy to clean.
  • Can the sink be adjusted to accommodate a wheelchair?
  • Is there ample, easy-to-reach storage for pots, pans and other equipment so that overhead racks and top-level shelving are not necessary?

Stairs

A home with stairs isn’t necessarily off the table for aging in place, as long as you are willing to make some adjustments if needed.

  • Can handrails be added to the staircase if there are none?
  • Is there room for a mechanized stair climber?
  • Is it possible to install an elevator in addition to the stairs?
  • If necessary, could you relocate all living to the main floor exclusively?

Flooring

In addition to the room considerations outlined above, you’ll also want a floor that doesn’t easily show wear and tear from canes, walkers, or wheelchairs.

Other Aging in Place Considerations

  • Are handles and fixtures easy to use for an older person with limited sight or mobility?
  • Are the hallways throughout the home wide enough for a wheelchair?
  • Are windows easy to open?
  • Is there a bonus room that could be used for a caregiver if needed?

Whether you’re looking to stay in your current home but need to make some aging-in-place modifications or you’re considering moving, we can help walk you through the design considerations and options.

Are You Headed for a Smart Home? What to Consider in a Renovation

If you’re renovating or remodeling your home, you should give serious consideration to smart home integrations. According to a recent study by the Consumer Technology Association, by 2022 the market for connected solutions for seniors is expected to reach nearly $30 billion. In addition to health care and medical devices, this market also includes home devices that impact safety, security, and control of things like lighting and HVAC. These technologies add an element of convenience to the home, but they also add a layer of accessibility for owners who may have decreased mobility, eyesight, or hearing. As more baby boomers age, the reliance on home automation for independent living will grow.

SmartHome features don’t necessarily increase resale value, but they may increase interest. This could help a home move faster at sale. By incorporating smart home connectivity into your remodel plans, you help ensure that your home will be attractive to a larger pool of potential buyers – or, if you intend to age in place, that you have the opportunity to benefit from assistive home automation.

Here are three ways to help future-proof your home for possible technology integration at a later date.

Choose a System

The first step is to understand what a homeowners automation needs are. Most mundane tasks can be automated at some level: security, life safety systems, shades, pool heaters, highly specialized audio visual systems, audiophile grade sound, gallery like lighting control, HVAC automation.

We typically match homeowners with an integrator to help choose a system. This is an industry expert who helps specify, program, install and maintain these systems. A good integrator is familiar with many eco-systems and can help guide a homeowner to the right gear for their need.

Systems at a high level of automation typically come from companies like Savant, Control4, Crestron, and Lutron HomeWorks. Pricing can run from $10k to $100’s of k. These systems offer impressive levels of control of many systems with simple, reliable devices. They will require closet space and ventilation. If these robust systems are being considered it’s usually best to be installed during a heavy renovation.

If it turns out your needs are modest, there are a range of more off the shelf solutions on the market now which can provide impressive features at very low cost: Apple Homekit, Google Home, Amazon Alexa, Nest, Logitech Harmony, Sonos, WEMO. These smaller systems are often not designed by integration consultants. To use these in a renovation you may need to roll up your sleeves and dig in on the manuals to specify your equipment with support from your architect to provide good locations for the gear and proper wiring.

Install Hardwire Liberally

As we discussed in a previous blog post, installing neutral hardwire will give you the largest number of options across different system platforms. WiFi has become increasingly reliable, but hardwire is much less prone to problems and allows faster data transfer for tomorrows huge video standards.

While this doesn’t guarantee that you’ll always be able to connect with every new device and platform that comes on the market, it does put you – or a future homeowner – in a good position to not have to open the walls up completely at a later date. Installing extra Cat 6, HDMI and Optical wiring to strategic places in your home will give you future flexibility.

Incorporate Home Automation Into the Design

The best outcome in using these systems is to have the controls be thoughtfully located and easy to replace. Automation system controls allow many, typically unsightly devices to be ganged together on one tiny plate or touch screen. This can help the aesthetics of a space quite a bit by eliminating banks of switches and knobs, but you will want to be aware of how you’ll be using them to put them in the most useful spot. Large devices that don’t necessarily need to be in living spaces (like cable boxes, or receivers) can be placed in remote locations so cabinets can be used for stuff you use, rather than gobs of av and wiring. Your architect and integrator will work together with you to carefully arrange your gear.

If you’re thinking about a remodel, we can help you walk through smart home technologies and what impact they might have.

Should You Renovate, or Buy a New Home? How to Decide

If you’re thinking about renovating, you’ve probably also considered moving. The thought of leaving home problems behind can creep in as you contemplate living in an active construction site. This can be a complicated decision, and one that enough people face that HGTV made an entire series about it. If you’re trying to decide whether to renovate or just move, here are some important things to consider:

Whether your current home can be altered to be what you need.

Architects can, and do, work magic. We can make small spaces look bigger, create storage where it didn’t seem possible, and completely move infrastructure to accomplish the design goals. There are some instances, though, in which even the most gifted architect won’t be able to renovate your home to your needs. For example, if you want your first floor expanded an additional 2,000 feet beyond your lot size, or if you want to turn part of your home into a commercial art gallery but local zoning regulations won’t allow it, those are issues that can only be resolved by moving.

This Bellport house was originally a standard Long Island 50's developer house. We skinned it, gutted the interior and added additions to give more living space to open it to the landscape.

Whether you’ll want – or need – to renovate your new home.

“Move-in ready” doesn’t always mean a new home fits your specific needs. Consider:

  • Are there things that will need to be done to the new home to make it functional for your daily life?
  • Even if there aren’t, are there things that will irritate you and cause sleepless nights until they’re resolved?
  • Will you have time to renovate before you move into your new home, or will you be moving into a construction zone?
  • How does the cost of renovating a new home compare with renovating your current home (and don’t forget carrying costs)?
Bellport home kitchen.

Whether you need to renovate your current home anyway to sell it.

Most homeowners want to sell their homes for more than they paid – and if there is a specific new home they’re looking to purchase, they may have an even higher target amount. It’s hard to sell a home for maximum profit if the bathroom is too small, if the only shower is in the basement, if the floors are in bad shape, or if the kitchen is really outdated. If fixing something to facilitate a sale also addresses the reason you wanted to move, it might be worth staying in the home instead of selling it.

Open kitchen and dining area with a view.

What your current co-op board, condo association, homeowners’ association, or other governing body is like.

Boards and associations have the power to define key elements of any renovation. They also govern over things like what color your window treatments can be, what days you can have furniture delivered, and whether your niece can stay in your home while you’re away. If you live in a building or a community with a good governing body, give careful consideration to whether you want to give that up. As anyone who’s moved can attest, you won’t usually know the pain points of your new regime until you’ve lived there for at least three months.

View from the dining room.

How your daily life will be impacted by a renovation.

Depending on the length of the renovation, living in your home during construction can range from a mild inconvenience to a total disruption to your daily life. For all but the most minor renovations of city apartments we recommend the owner move out for the duration of the work. The good news, though, is that when the work is completed, you’re already in your “new” home.

Newly created outdoor space.

If you’re on the fence about renovating versus moving, we can walk you through your design options in both your current home and your potential new home to help you arrive at the solution that’s best for you.

Considerations for Home Office Design

Whether you run a business from your home or you just need a place to catch up on work in off-hours, a designated home office space can boost your mood and your productivity. Here are four things we consider when designing a home office:

Home Office Basics: Lighting and Heat and Cooling

We look at the kind of work you plan to do, the times of day you tend to work best, and the availability of natural light when designing your lighting system. We also consider the heating and cooling of your entire home to ensure that you’ll be able to adjust the temperature in your office without impacting the rest of the home.

The Connected Home Office

In a universe of infinite technological upgrades, we work with you to determine what you need (must haves) and what you’d like (nice to haves). We start with key items, like the number and placement of electrical outlets and whether you’ll need a WiFi booster or even a separate router in the space. As devices are added, we also design to contain and conceal cord and other wires.

It can be tempting to custom design cabinets around electronics like printers, scanners and other gear. We work to design ways to contain these kinds of gear in ways that allow the cabinets to still be useful after the component has become obsolete.

Home Office Amenities for Visitors

If you plan to have meetings with clients or other visitors in your home office, consider incorporating some amenities to make them comfortable. If possible, a separate entrance can relieve visitors’ apprehension about being in your private space. A restroom or powder room directly accessible from the home office is a thoughtful amenity that relieves both you and your visitors of any anxiety about having professional colleagues in your personal bathroom. Sound insulation can help guests focus on what you’re saying and not on what may be going on in other areas of the home.

Making the Home Office Yours

At the end of the day, it’s your home office and should reflect your style, personality, and needs. We design with storage in mind, so that you have plenty of space for business records, reference materials, and supplies while also maintaining a calm environment. Ergonomic seating is a must, but to avoid the standard “office chair” look, we can customize chairs to be as beautiful as they are functional. Your desk style should match your needs: do you use a computer with multiple monitors? Do you need room for large drawings? Do you need a printer on your desk? We also custom design and fabricate desks that fit your needs and your aesthetic. If you plan to have small children or pets in your home office space, we take that into consideration as well: avoiding sharp edges at child or pet height, creating informal “kid” or “pet” spaces within the office, and choosing materials and fabrics that will be easy to clean.

If you could benefit from a new or renovated home office, we can walk you through the process so you know what to expect in terms of cost and budget.

Four Ways to Use Living Coral, Pantone’s 2019 Color of the Year

Pantone’s 2019 Color of the Year is Living Coral. If you’re looking to be on-trend but the thought of coral pink walls seems too intense, we’ve identified several subtle ways to incorporate the color into your home.

For most homes, coral pink works best as an accent color. It works well with neutrals, gold, and silver-grays. It can be muted or vibrant, depending on the context. The more vibrant the hue, the more sparingly you may want to use it.

Upholstery


A custom chair with coral upholstery feels warm and inviting, and offsets the coolness of the sconce above it.

Patterned Linens

Ways to Use Living Coral | Patterned Linens
A custom matching coverlet and headboard using a coral fabric. The white floral pattern helps coral work in a more traditional space.

Living Room and Fireplace in Mid-Century Modern Fire Island Pines Beach House | Rodman Paul Architects
Custom accent pillows in a modern pattern deliver an appropriately scaled pop of color.

Subtly Toned Objects

Living Coral | Subtly Toned Objects

Feathered branches in a muted coral balance well against the neutral color scheme and provide visual interest without disrupting the feeling of serenity and calm.

A Single Object

Upper East Side Prewar Renovation Kitchen | Rodman Paul Architects

A single coral flower stands out against a completely white kitchen.

If you’re looking for ways to subtly incorporate more color into your home, we can help. Contact us to talk about design and color options.

6 Steps to Selecting the Right Contractor

A really good contractor is critical to the success of your project. Without the right contractor, your exquisitely designed dream home risks becoming a nightmare. If you’ve never commissioned a co-op, condo or apartment, how do you go about selecting the right contractor for your project?

1. Understand who you are.

Architects approach projects in a particular way. We generally recommend a thorough and careful design period in which we document the entire design before construction begins. We give you the drawings, material samples, and time you need to understand what will be built before we start. Because this process is so detailed and organized, change orders and cost escalations from unforeseen problems are usually very limited – we typically see overages of less than 5% when a careful process is followed. For many clients, this process is ideal and meshes well with how they tend to approach other aspects of their lives.

The type of contractor for this approach is thorough and experienced, and generally has several staff both in the field and in the office who help to schedule trades, delivery of materials, and generally help the staff to deliver. Ability to stick to budgets, timelines, and plans is paramount.

That may not be your style, though. You may be more comfortable making decisions as the structure is being built, so you can easily visualize what’s at issue and what the outcomes might be. The “paper” design phase that is key to the architect’s approach may leave you frustrated and be something that you want to get through as fast as possible. This approach requires knowledge and flexibility, and comes with a certain amount of risk – which can be managed if you have the right people involved. This approach can require a different kind of contractor, and often the best outcome will be from a team that isn’t necessarily super organized, but is definitely trustworthy, affable and willing to absorb or negotiate in good faith through the unexpected.

2. Ask for referrals.

Your architect, friends, family, the building super, and the building manager are all good resources to mine for information. Be attentive to any complaints that are raised and try to understand why conflict, if any, occurred (it’s not always the contractor!). Direct references are good, indirect references are even better. If approached reasonably, most former clients will give a fairly honest recap of how their project went.

3. Look at prior work.

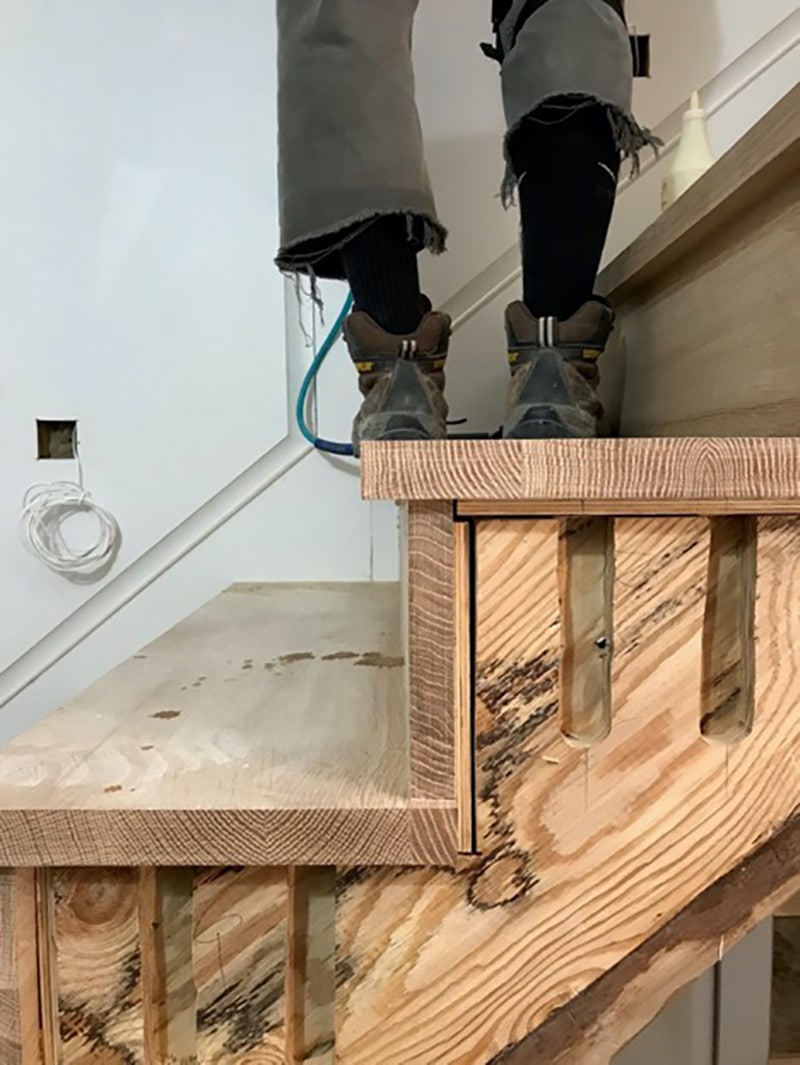
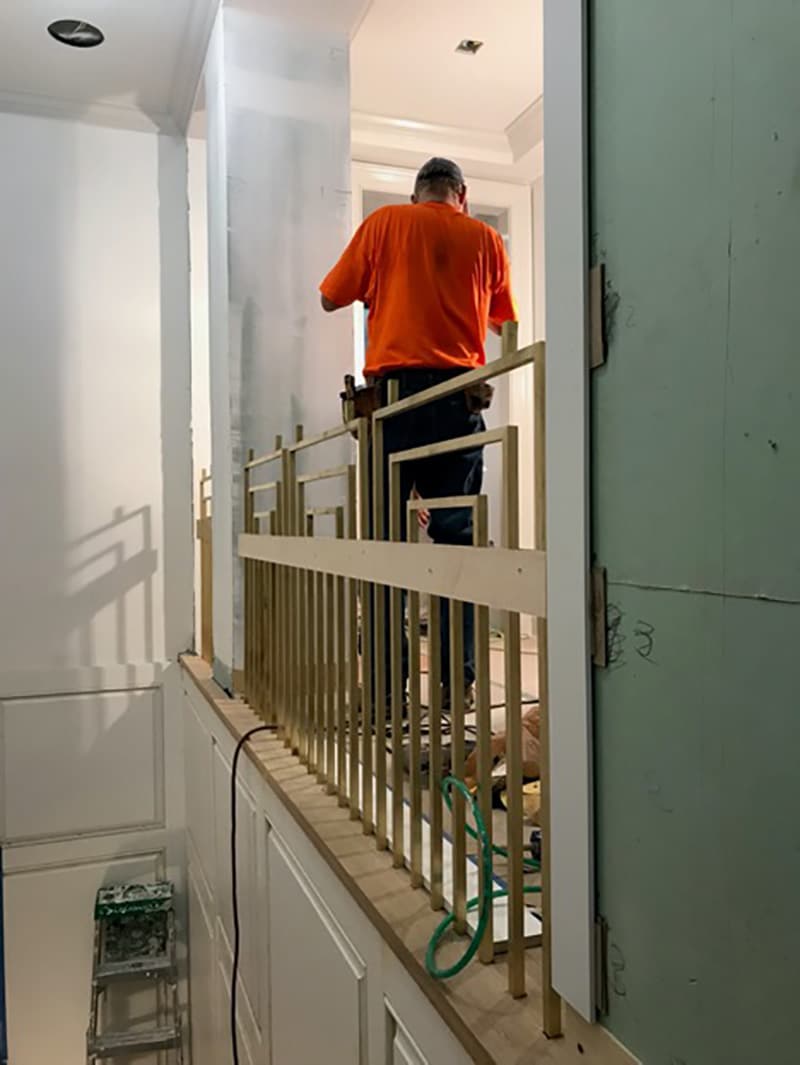
Try to look at examples of work done by the contractor on a scale similar to your planned work. After two or three years, is the work holding up? Does the AC work reliably, are the cabinets wearing well, do the doors operate smoothly, is the paint nice and neat, nothing requiring major repairs? Is the contractor still helpful with the inevitable odds and ends that do need repair – and if not doing them with his team, did the contractor help to find proper support?

4. Meet face to face.

As your architects, typically we will be working with your general contractor on a day-to-day basis while your project is being built. However, the GC’s contract is with you, and you pay the bills. You should meet the GC as well as his field representative before they are hired, just as you would with any substantial vendor. If there is anything about the GC or his team that leaves you questioning or worried, try to get to the bottom of it with your architect. The process of completing a project is difficult enough that you need to feel comfortable with your team and able to have difficult discussions if, or when, needed.

5. Ask lots of questions.

You should feel free to ask whatever questions are on your mind, the way the contractor answers you will help you build an understanding of how they will work with you and the rest of your team, some good things to ask:

How many people compose the project team?
Who from the team will be directly focused on your project?
Can I meet the foreperson and/or the project manager who will be at the site every day?
How long have they been with the company?
Who will be the main subcontractors?
How long has the GC been working with them?

6. Review – and make sure you understand – the contract.

It’s typically part of our role as your architects to review the GC contract with you and point out any issues or problems. But as the client and owner, it is a very good idea for you to read through the entire contract with us and with your contractor to make sure that you understand all of the provisions. This is also the case with the set of drawings that forms the basis for the contract – if you’re aware of what is and is not included in the scope of work, you won’t be surprised by misunderstandings later in the process.

Every building project hits some kind of snag, but if you go through these steps to establish clear expectations and a firm relationship with your contractor, you have a much greater chance of a successful outcome.

Looking for help defining your project needs? Contact us today for a complimentary assessment of your project.

Five Ways to Add Value with an NYC Apartment Renovation

Whether you bought your unit with a goal of renovating or you’re having the “time for a change” renovation itch, knowing whether your ideas are going to increase your home’s value can be challenging. Here are five ways that may make your renovation a value-add.

1. Research what is missing from the neighborhood and fill the gap.

Real estate news and real-estate focused websites like Curbed are great places to discover what types of homes people are looking for in your neighborhood – and what they’re not able to find yet. For example, if you live in a family neighborhood without many multi-bedroom units, consider subdividing your unit to create another bedroom, or combine smaller apartments to create that sought-after larger multi-bedroom home. Do you live in a neighborhood focused on nightlife? Renovate with an eye toward people who love to entertain: an open plan, a cool kitchen, or a bar addition can make your home highly desirable to the most likely buyers.

2. Fix the obviously wrong thing.

If there was something that made you question buying the place in the first place… fix it, especially if it’s relatively simple or costs less to fix than it would appear. For example, if the apartment has a giant bedroom and tiny bathroom, enlarge the bath. If the windows are falling apart, replace the windows; if the home lacks air conditioning, add air conditioning. Add or enlarge a window to a view if your building will allow it. These types of practical, functional renovations can seem less exciting than more visually dramatic moves, but they will increase the number of potential future buyers. And if something struck you as a potential problem when you first bought, it’s probably been lurking in your subconscious ever since. Do yourself a favor and just fix it.

3. Add a bathroom or powder room if your building’s rules allow.

Very few people in New York City have ever had “too many bathrooms.” One bathroom per bedroom is a gold standard. If you don’t have the room for an additional full bathroom, adding a powder room can bring comparable value.

4. You can’t go wrong with kitchen and bathroom renovations.

Renovating an existing kitchen or bathroom is a generally sound investment. Renovating a grimy bathroom or a dated, overused kitchen can improve your home’s resale value with most of the cost at least recovered at resale. As a bonus, kitchen and bathroom renovations will also greatly improve your day-to-day life for the duration of time you own the home.

5. Spend wisely.

If you’re renovating solely with an eye to reselling, don’t overdo it. Add “nice” cabinetry and appliances, rather than more expensive, “luxurious” versions. Avoid lots of personalization or “signature” touches, unless you’re planning to remove them prior to putting your unit on the market. Perhaps most importantly, don’t move pipes if you can help it.

If you’re planning to stay from ten years to forever… don’t compromise, make the home what you’ve always wanted.

If you’re thinking of renovating, we’d be happy to walk you through your goals and options. Contact us for a no-cost consultation.