Considering Renovations? Why It Matters If You Own a Co-Op, a Condo, or a Townhouse

In New York, home buyers have four general options: a cooperative apartment, a condominium apartment, and a townhouse – or, outside Manhattan, sometimes a free standing house. Aside from some obvious differences, what are some of the less visible differences?

Renovation Considerations for Co-Ops

First and foremost, in a cooperative apartment you will be buying not “real estate” per se, but shares in a corporation that give you the right to live in a particular unit subject to the rules of the corporation.

While these rules can make your daily life easier, they can also present challenges when embarking on an architectural project. The first set of rules you will encounter is usually called the Proprietary Lease and the Bylaws, and these apply to all owners at all times. Additionally, in order to protect itself from liabilities and bad decision making by individual cooperative owners, contractors, and outside vendors, the boards of cooperative corporations create additional sets of rules that apply to almost any renovation work. The most important of these is usually called the Alteration Agreement, and may be accompanied by a set of House Rules and/or Building Rules. These rules affect almost every aspect of getting work done: you will not be able to start work until you have fulfilled all the obligations listed in the Alteration Agreement, its requirements will inevitably affect the price of the work, and the building will typically charge you a large security deposit as a guarantee towards your adherence to all the rules. In addition to the above, the building will also typically hire its own architect or engineer to review all your plans, at your expense, as well as to inspect the progress of the work as it moves along. And not least, many cooperatives will charge you fees as long as your construction lasts, and might even penalize you for overshooting your schedule. As the name implies, living in a co-op requires cooperating with a larger number of people than you might otherwise imagine when you begin to think about renovating.

There is an upside! Co-op maintenance fees pay for building staff that a busy city dweller may find useful. Building staff not only repair and maintain the building, but aspects of the apartments as well. Some helpful services include: receiving packages, providing basic security, cleaning public areas, mediating with bad neighbors, and being on call in emergencies (floods, fires, and so on). They are there to deal with the general business of owning a building in New York.

Renovation Considerations for Condominiums

The most basic difference with a condominium apartment is that you are actually buying a small part of a larger building, and you will own that piece of “real estate”. This means that you will pay your taxes directly to NYC rather than through your maintenance. Although a condominium board could impose the same burdensome rules as a co-op board, in practice the rules are a bit looser. There will still be an Alteration Agreement, and Building Rules, but typically a bit easier to navigate than in a co-op. There will still be a building architect or engineer to protect the building’s interests, but he or she may be somewhat more inclined to help you achieve your renovation goals. If you keep in mind all the issues that could apply to a co-op renovation, you won’t be caught off guard in a condominium.

Like co-ops, condominiums also have maintenance fees which can cover a range of services, from the most basic to virtual maid service. The list of services available in some of the newer condominiums puts a new definition on luxury.

Renovation Considerations for Townhouses

In a townhouse, or standalone home, the homeowner becomes the building manager. When something breaks, you need to figure out how to get it fixed and you pay for it. You take your own trash out and you clean up the sidewalk after SantaCon. If the Environmental Control Board (ECB) issues you a violation for something, you need to figure out how to resolve the problem.

But for those who can afford it, owning a townhouse has a significant advantage when it comes to renovations: you can skip most of the aggravating reviews and regulations that co-op and condo owners face with a renovation project. You will be subject to the rules and regulations of the New York City Building Department, and you will have to have an architect file for any permits that the City may require, but you will have no board to deal with, no building engineer inspecting your work, and no neighbors to complain about your construction. Even more importantly, your construction schedule can be as long as you are willing to endure it. This gives townhouse owners a great deal of freedom to design their interiors in any way that suits their lifestyle. Very occasionally there will be issues to settle with the neighboring houses, but if work is planned properly, this should be a rare occurrence.

Your approach to a renovation or remodel will need to be slightly different depending on your home type, and it’s important to have architects and contractors who have experience in that home type so the project is as successful as it can be. We have worked extensively across all home types, and would be happy to discuss the best approach for your situation.
6 Steps to Selecting the Right Contractor

A really good contractor is critical to the success of your project. Without the right contractor, your exquisitely designed dream home risks becoming a nightmare. If you’ve never commissioned a co-op, condo or apartment, how do you go about selecting the right contractor for your project?

1. Understand who you are.

Architects approach projects in a particular way. We generally recommend a thorough and careful design period in which we document the entire design before construction begins. We give you the drawings, material samples, and time you need to understand what will be built before we start. Because this process is so detailed and organized, change orders and cost escalations from unforeseen problems are usually very limited – we typically see overages of less than 5% when a careful process is followed. For many clients, this process is ideal and meshes well with how they tend to approach other aspects of their lives.

The type of contractor for this approach is thorough and experienced, and generally has several staff both in the field and in the office who help to schedule trades, delivery of materials, and generally help the staff to deliver. Ability to stick to budgets, timelines, and plans is paramount.

That may not be your style, though. You may be more comfortable making decisions as the structure is being built, so you can easily visualize what’s at issue and what the outcomes might be. The “paper” design phase that is key to the architect’s approach may leave you frustrated and be something that you want to get through as fast as possible. This approach requires knowledge and flexibility, and comes with a certain amount of risk – which can be managed if you have the right people involved. This approach can require a different kind of contractor, and often the best outcome will be from a team that isn’t necessarily super organized, but is definitely trustworthy, affable and willing to absorb or negotiate in good faith through the unexpected.

2. Ask for referrals.

Your architect, friends, family, the building super, and the building manager are all good resources to mine for information. Be attentive to any complaints that are raised and try to understand why conflict, if any, occurred (it’s not always the contractor!). Direct references are good, indirect references are even better. If approached reasonably, most former clients will give a fairly honest recap of how their project went.

3. Look at prior work.

Try to look at examples of work done by the contractor on a scale similar to your planned work. After two or three years, is the work holding up? Does the AC work reliably, are the cabinets wearing well, do the doors operate smoothly, is the paint nice and neat, nothing requiring major repairs? Is the contractor still helpful with the inevitable odds and ends that do need repair – and if not doing them with his team, did the contractor help to find proper support?

4. Meet face to face.

As your architects, typically we will be working with your general contractor on a day-to-day basis while your project is being built. However, the GC’s contract is with you, and you pay the bills. You should meet the GC as well as his field representative before they are hired, just as you would with any substantial vendor. If there is anything about the GC or his team that leaves you questioning or worried, try to get to the bottom of it with your architect. The process of completing a project is difficult enough that you need to feel comfortable with your team and able to have difficult discussions if, or when, needed.

5. Ask lots of questions.

You should feel free to ask whatever questions are on your mind, the way the contractor answers you will help you build an understanding of how they will work with you and the rest of your team, some good things to ask:

How many people compose the project team?
Who from the team will be directly focused on your project?
Can I meet the foreperson and/or the project manager who will be at the site every day?
How long have they been with the company?
Who will be the main subcontractors?
How long has the GC been working with them?

6. Review – and make sure you understand – the contract.

It’s typically part of our role as your architects to review the GC contract with you and point out any issues or problems. But as the client and owner, it is a very good idea for you to read through the entire contract with us and with your contractor to make sure that you understand all of the provisions. This is also the case with the set of drawings that forms the basis for the contract – if you’re aware of what is and is not included in the scope of work, you won’t be surprised by misunderstandings later in the process.

Every building project hits some kind of snag, but if you go through these steps to establish clear expectations and a firm relationship with your contractor, you have a much greater chance of a successful outcome.

Looking for help defining your project needs? Contact us today for a complimentary assessment of your project.

Five Ways to Add Value with an NYC Apartment Renovation

Whether you bought your unit with a goal of renovating or you’re having the “time for a change” renovation itch, knowing whether your ideas are going to increase your home’s value can be challenging. Here are five ways that may make your renovation a value-add.

1. Research what is missing from the neighborhood and fill the gap.

Real estate news and real-estate focused websites like Curbed are great places to discover what types of homes people are looking for in your neighborhood – and what they’re not able to find yet. For example, if you live in a family neighborhood without many multi-bedroom units, consider subdividing your unit to create another bedroom, or combine smaller apartments to create that sought-after larger multi-bedroom home. Do you live in a neighborhood focused on nightlife? Renovate with an eye toward people who love to entertain: an open plan, a cool kitchen, or a bar addition can make your home highly desirable to the most likely buyers.

2. Fix the obviously wrong thing.

If there was something that made you question buying the place in the first place… fix it, especially if it’s relatively simple or costs less to fix than it would appear. For example, if the apartment has a giant bedroom and tiny bathroom, enlarge the bath. If the windows are falling apart, replace the windows; if the home lacks air conditioning, add air conditioning. Add or enlarge a window to a view if your building will allow it. These types of practical, functional renovations can seem less exciting than more visually dramatic moves, but they will increase the number of potential future buyers. And if something struck you as a potential problem when you first bought, it’s probably been lurking in your subconscious ever since. Do yourself a favor and just fix it.

3. Add a bathroom or powder room if your building’s rules allow.

Very few people in New York City have ever had “too many bathrooms.” One bathroom per bedroom is a gold standard. If you don’t have the room for an additional full bathroom, adding a powder room can bring comparable value.

4. You can’t go wrong with kitchen and bathroom renovations.

Renovating an existing kitchen or bathroom is a generally sound investment. Renovating a grimy bathroom or a dated, overused kitchen can improve your home’s resale value with most of the cost at least recovered at resale. As a bonus, kitchen and bathroom renovations will also greatly improve your day-to-day life for the duration of time you own the home.

5. Spend wisely.

If you’re renovating solely with an eye to reselling, don’t overdo it. Add “nice” cabinetry and appliances, rather than more expensive, “luxurious” versions. Avoid lots of personalization or “signature” touches, unless you’re planning to remove them prior to putting your unit on the market. Perhaps most importantly, don’t move pipes if you can help it.

If you’re planning to stay from ten years to forever… don’t compromise, make the home what you’ve always wanted.

If you’re thinking of renovating, we’d be happy to walk you through your goals and options. Contact us for a no-cost consultation.

What’s Involved in an Architectural Project?

The idea of undertaking an architectural project can seem overwhelming, especially if this is the first renovation or construction project a homeowner has been involved with. What exactly is involved in a project, and what role does the architect play?

To help demystify the process for you, what follows is a description of the “full architectural design services” that we typically provide in a New York City apartment renovation. These services are divided into phases orchestrating the project from an idea to a built place.

Phase 1: Pre-Design

The Pre-Design phase is about collecting information before we set pen to paper. In this phase, we work with you to define what the project is.

First, we conduct an existing conditions survey so that we know exactly what we’re working with. We measure and draw the apartment ‘as-built’ to locate walls, door and window openings. We preliminarily identify the locations of existing pipes, beams, electric services, and columns, sometimes we even knock a few holes in walls to determine what can’t be moved. We use the results of this existing conditions survey as a base plan from which to design.

Next, we interview you a bit to get a full understanding of your needs for the space you’re considering altering or creating. In the case of a New York City apartment renovation, we review the building’s alteration agreement (a document most apartment buildings have which sets forth the rules of renovating), the existing apartment layout, and the building’s systems and infrastructure to uncover design challenges, design opportunities, and the ability to meet your objectives for the space.

This feasibility analysis in pre-design helps us determine what’s possible and allows us to identify any potential obstacles before we get too far into a project — sometimes even before the apartment is purchased.

Phase 2: Schematic Design

In the Schematic Design phase, we create the initial designs for the desired structure or space. We take what we learned in pre-design and start to give the spaces shape and form. We create sketches of the proposed apartment layout, with as many iterations as necessary to meet your objectives. These sketches might be line drawings, hand sketches, 3D computer renderings, or a combination of these visualization tools.

We begin all designs with a gracious furniture plan. This involves laying out where your current or desired furniture should be so that the resulting design works with your belongings.

The Schematic Design phase also includes initial consultant management. We identify tasks that will need to be completed by consultants and help you to identify the project team. Once consultants are selected, we coordinate their work with the design and communicate the consultants’ roles to you so you understand what is being done and why. The most common types of consultants for New York City apartment renovations are engineers (mechanical, electrical, plumbing, and acoustic), home control systems/technology/audio-visual experts, asbestos and lead paint testers, window specialists, and interior decorators.

Phase 3: Design Development

In the Design Development phase, the design becomes more specific and includes materials and building technologies. Drawings are prepared that show all surfaces (walls, ceilings, floors, interior and exterior) in the project area. We work with you to select preliminary materials and components, including tile, plumbing, electrical, plumbing fixtures, hardware selections, cabinetry and millwork design.

In this phase our role as architect includes work on regulatory filings. We identify the permits that need to be obtained from federal, state, and New York City regulators and complete all tasks necessary to acquire the permits (or we help find the people who can). For buildings that have historical landmark status, we also produce drawings and sample submissions to acquire the approval of the Landmarks Preservation Commission (LPC). With decades of experience working with the Department of Buildings (DOB) and LPC, we know not only their regulations but also their preferences. This helps ensure that the regulatory process is as efficient as possible.

Lastly, the Design Development, or “DD,” phase includes support for your building’s management review process. We produce effective strategies, drawings and exhibits to convey your design objectives and usher the project through co-op and condo board reviews as quickly as possible. As needed, we meet with building and board architects as well as review boards and committees. We are adept at shepherding the process carefully and efficiently to maintain positive building relationships.

Phase 4: Construction Documentation

In the Construction Documentation phase, we create all drawings, details, and specifications needed so that the builders understand exactly what needs to be done — and where it needs to be done. This includes demolition plans, construction plans and interior elevations that show the heights and proportions of walls, windows, doors, and built-ins along with all trim and ornamentation. We also create documentation for all millwork details and custom trim designs. Lastly, we create component schedules that show when items like plumbing fixtures, hardware, and accessories will be delivered and installed.

Phase 5: Construction Administration

When it’s time to select contractors, we provide assistance bidding the project with multiple contractors from our select list and any additional contractors you’d like to offer. We also provide support in qualifying bidders to make sure that they are able to deliver the work needed to make the project a success. Additionally, we can assist with the negotiation process with the desired contractors.

Our construction administration services include reviewing the project on an ongoing basis as it’s built, to confirm that the builder meets the design intent and that work conforms to the contract and the building codes. In apartment renovations especially, the unexpected happens. Having an architect review a project as it’s built helps catch problems before they get far down the line.

Once the project is finished, we coordinate the submissions to your building management for return of any deposits and we file the certification of project completion with DOB regulators.

Through all of these phases, we maintain a clear focus on creating comfortable and stylish spaces for our clients live in. We’d be happy to provide a consultation at no cost to explore the role an architect can play in your project.

Seven Considerations for Renewing a Beach House

If your ideal summer includes relaxing in your outdoor living room as you gaze out over the water, you’ve no doubt thought about renovating a beach house to become your dream house. While beach house renovations are similar in some ways to primary residence renovations, there are some unique differences to think about and plan for.

Considering the Original Era of the House

Knowing when (and why) the original house was built will give you a baseline understanding of what might need to be changed. In Fire Island Pines, for example, unrenovated houses generally fall into one of two categories: mid-century or 1970’s. The mid-century homes tend to be smaller with pitched roofs, and some were even prefabricated on Long Island and floated across the water, where they were re-installed on pilings. Homes from the 1970’s tend to be boxier with flat roofs. Both can be renovated as the owner wishes, but each involves a different approach and different considerations.

Shifting the Focus Outward

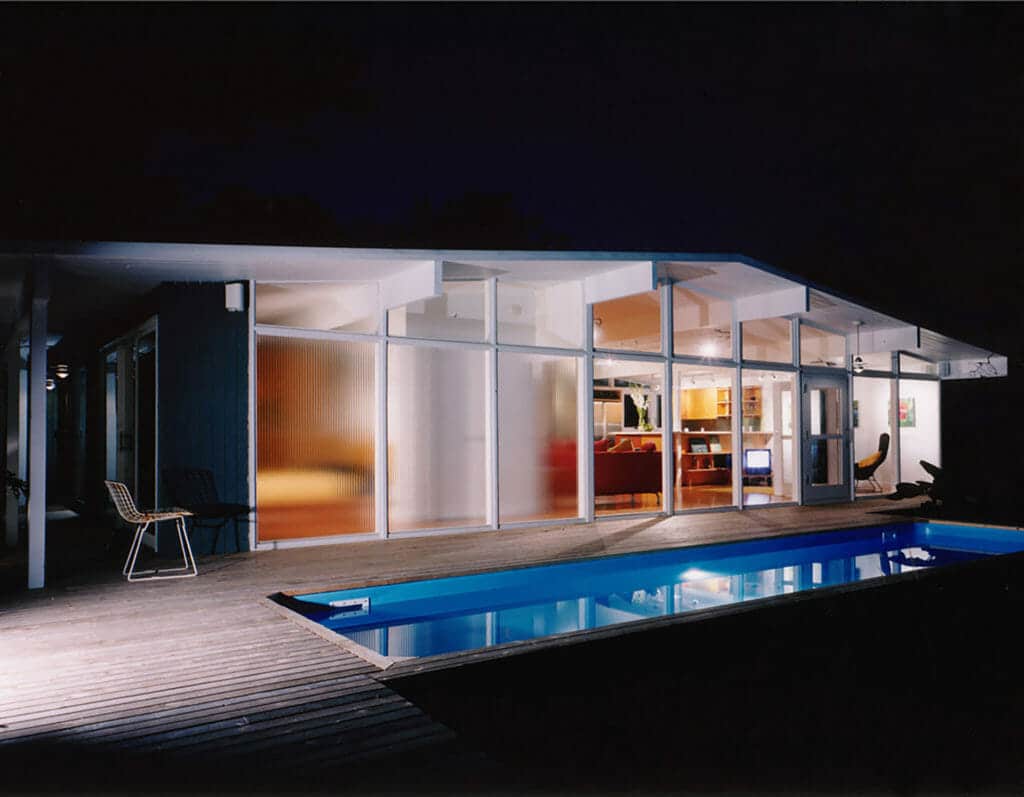
It’s a beach house, so having a connection to the outdoor living areas and drawing the eye toward the water or the outdoors are paramount. Remarkably, this was not always a concern when the original houses were built, so a large part of the renovation effort will involve creating outdoor living, dining, cooking, and entertaining areas, along with reshaping the interior house plan so that windows and doors focus the views. Pools didn’t become a desired amenity until the mid-1970’s, so our designs usually include the addition of a pool that integrates with the outdoor living space and the view. With residents spending the bulk of their time in outdoor areas, we strive to make outdoor living rooms that are light years beyond the umbrella-table-and-four-chairs approach of yore.

Renewing the Foundation

Depending on the age and climate history, the foundations of the house may not be in the best shape. In Fire Island Pines, for example, almost all houses are set on pilings, and any original locust wood pilings are over 60 years old. When we begin planning a renovation in the Pines, it almost always involves redoing the pilings. Although this part of the project is obviously less interesting for the homeowner, it’s critical path to ensuring level floors, functioning doors, and the home’s continued existence.

 Incorporating Appropriate Fabrics and Furnishings

We work equally hard on furnishing plans for the outdoor spaces as for the indoor spaces. To live comfortably in the outdoor spaces, you need sun, shade, comfortable furniture, and it has to be run through all the outdoor weather scenarios. The last thing a beach dweller wants to deal with is moldy, mildewed, or chlorine-damaged furniture. The good news is that modern improvements in fabric mean ever-increasing options for outdoor furniture – and even carpets –  that don’t get moldy or mildewed.

Two products that we frequently work with and recommend are Perennials Fabrics and Chilewich carpets, although there are at least a dozen major fabric houses producing fabrics that are sunproof, chlorine-proof, and feel like normal fibers. It’s possible now to have truly comfortable outdoor furniture, and we recommend using the same fabrics for the interior spaces to protect against someone in a wet swimsuit inadvertently staining a sofa or chair. We take the same approach to carpeting for the same reason, and Chilewich’s carpets work fabulously well outdoors and as well as indoors.

Things to Consider When Updating a Beach House | Rodman Paul Architects

Choosing All-Year or Seasonal

Beach houses were originally built only for the summer season; year-round beach houses didn’t become fashionable until the 1980’s. If an original house had gas or electric heat, it was possible to push the boundaries of its use to early spring and fall, but in the main houses weren’t sufficiently insulated to be winterized. If you prefer to winterize so you can use your beach house year-round, you have to start with “winter water,” which involves sinking the water main low enough so that it doesn’t freeze and burying the piping. Next comes insulating the walls and ceilings to a level that meets code and keeps the heating bills reasonable. And lastly, since the house is on pilings, you have to skirt the house all the way around the bottom or insulate the floor.

Addressing Climate Concerns

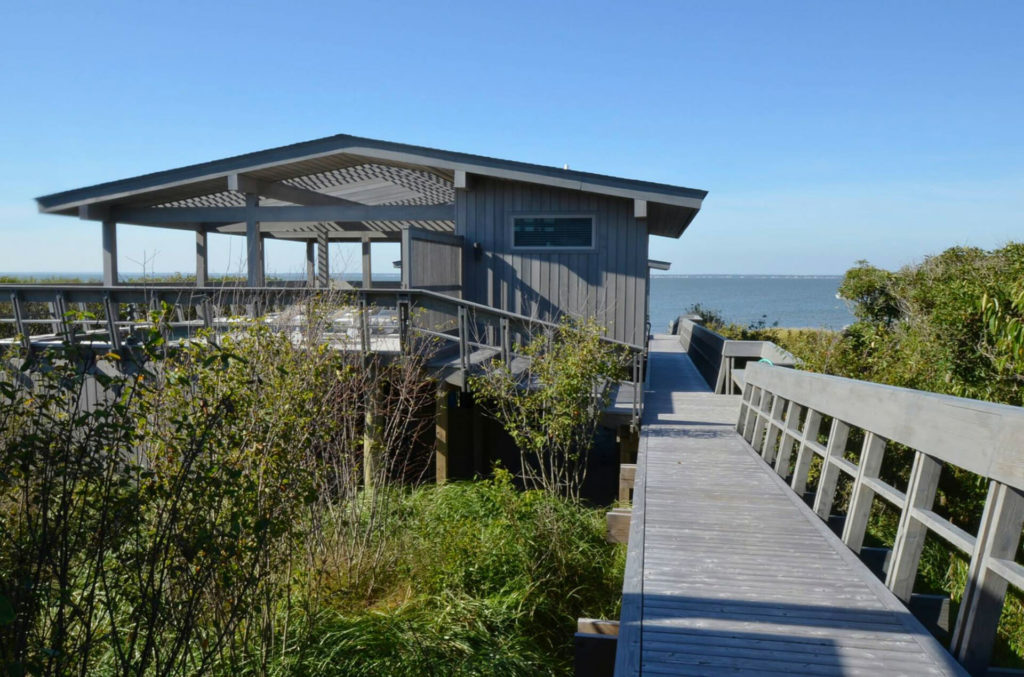
Of increasing importance is the weather: flooding, hurricanes, and global warming all impact the design of a house. Sufficient elevation is crucial to protect against flood damage and meet FEMA floodplain requirements. Depending on the required elevation, the relationship between the house and the land can become distorted; a three-foot elevation can be concealed with bushes, but a ten-foot elevation calls for a ramp or steps and usually some kind of screening to conceal the pilings. For our Water Island project, the only way to conceal a significant elevation and establish the relationship to the landscape was to thickly plant beach plum and native black cherry shadbush trees. The trees establish a new kind of ground plane that frames the houses and avoids unsightly views of the undersides of the houses.

Many beach homeowners used to leave their AC systems, pool pumps, and sheds on the ground and out of sight, but FEMA regulations no longer permit that. Everything must be located at or above FEMA flood elevations. Building platforms for the mechanical equipment is an option, but if you are subject to coverage limitations, those structures will also count toward your overall coverage and may put you over the legal limit. To avoid this problem, we try to find creative solutions to conceal them in other structures so that they don’t add to coverage.

Hurricane-proof glazing for windows and doors is recommended, but it is expensive and heavier than traditional glazing products. It’s tested for projectile impact, although there is still debate over whether it would actually prevent damage in the event of a full-on hurricane. Some owners take the option of storing plywood, drills, and screws for boarding up windows in the event of a hurricane warning.

Tips for Restoring a Beach House | Rodman Paul Architects


Knowing – and Following – Applicable Regulations

In each beach community there will be different building, zoning, and construction regulations that will impact your project and your budget. For example, “renovations” are usually subject to different regulations than “new construction,” and it’s important to know which is more advantageous to you. If you aim to fall within the “renovation” category, for instance, you can still take the house down to a bare roof and bare studs, and then add new sheathing, siding, insulation in the walls and roof, and interior finishes.

Generally, beach communities also have either a homeowners’ association or a loose approximation of one. Membership may be mandatory or optional, but usually this group will carry a certain amount of influence with zoning and regulatory authorities. Knowing what the group in your community prioritizes, values, and dislikes can help avoid unpleasant surprises from your planning and permitting processes.

It’s also important to know whether your home is subject to any Federal rules. As an example, Fire Island Pines is located within the Fire Island National Seashore, a national park which is protected by Federal zoning rules. Chief among those is an an aggregate lot coverage rule specifying that for all structures built on a lot, the total coverage cannot exceed 35% of the total lot coverage. Federal rules can also impact the height of the house and the setbacks.

Knowing and planning for the rules can help keep your project moving. If you have your permits in order, construction can almost always be completed within one off-season cycle.

Beach houses can be a source of great joy – I have been a happy Fire Island Pines homeowner for more than 30  years. If you’re thinking about renovating yours, let us be a resource for you. Contact me at rpaul@rodmanpaul.com to set up a consultation.

Related Projects

Bay Walk

Bass Walk

Water Island

Our Interview for Brick Underground: Renovating a Prewar Classic 6

Renovating a prewar New York apartment tends to involve a set of challenges that are unique to other kinds of renovations. Thankfully, these challenges tend to be predictable, with experience. They can also present opportunities for innovation and creativity.

In an interview for Brick Underground, Michael Fasulo walks apartment owners through the most common issues involved in a prewar renovation, including how to make the best use of your apartment while navigating the layers of rules and technologies in prewars. At the beginning of every project, we discuss these items and others with our clients to make sure they have a complete understanding of what’s involved in the renovation process and the design opportunities that exist. This makes the renovation process a positive experience for everyone.

Renovating a Prewar NYC Apartment
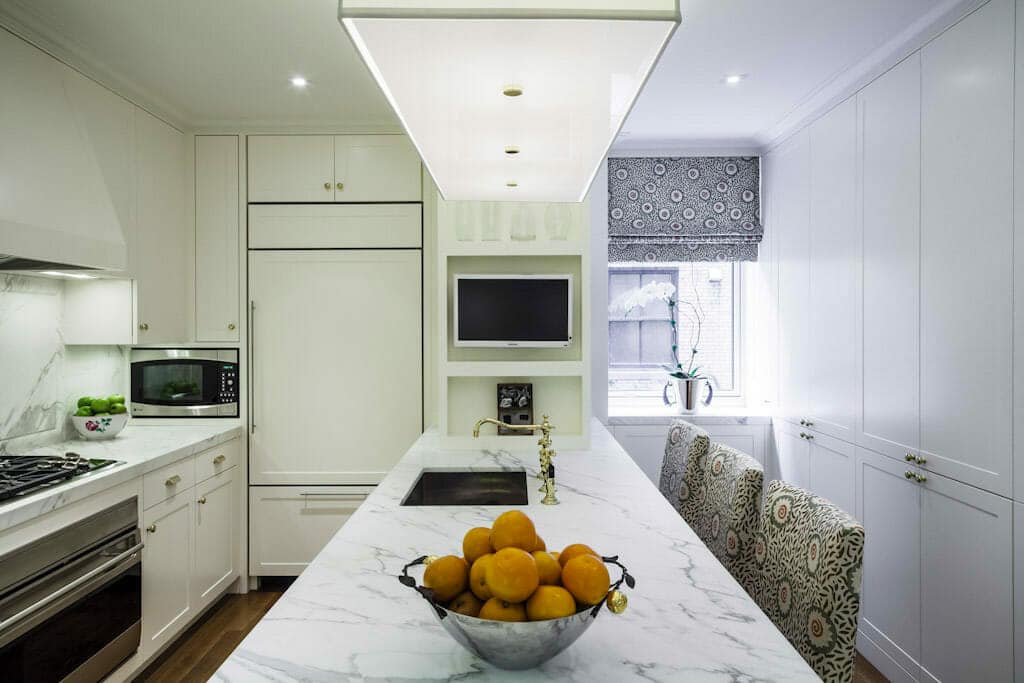
Renovated Park Avenue kitchen.

To learn more about what’s involved in a New York prewar classic six renovation, read the full Brick Underground interview here.

How to Make Bold Colors Work in a New York City Apartment

One of most talked-about design trends for 2018 is “bold colors.” Gorgeous photos of wall-to-wall emerald green, crimson, and even “Gen-Z yellow” serve as a siren song to New Yorkers weary of sleet filled grey canyons.

The size and shape of New York apartments can mean there’s less room for error when you’re working with big, deep colors. Before you paint your entire apartment in Ultraviolet (Pantone’s 2018 Color of the Year), here are some guidelines for using bold color.

  • If you’re in for a color, go all in. Accent walls feel timid, and you get the most impact by committing to the color. Do all of the walls in a room or alcove, consider doing the trims too.
  • If you have something which can read as an object in the space like columns, millwork, an alcove of vestibule or even an exposed radiator, punch it up with rich color.
How to Make Bold Colors Work in a New York City Apartment 3 | Rodman Paul Architects
A pop of color: lined cabinet interiors
  • Think about how the colors will look not just during the day, but at night and in various lighting conditions. Does your space have an abundance of natural light? Does it rely primarily on artificial lighting? What color is the flooring? Will it reflect light back into a dark space?
  • When using deep colors, make certain that you have full, strong artificial lighting to bring out the depth of the color.
  • Colored backgrounds with patterns or textures in paint, wallpaper, and special paint finishes can be good alternatives to solid blocks of color. Patterns are also good at concealing imperfections in a wall you don’t/can’t replace, an issue encountered in pre-war apartments.
How to Make Bold Colors Work in a New York City Apartment | Rodman Paul Architects
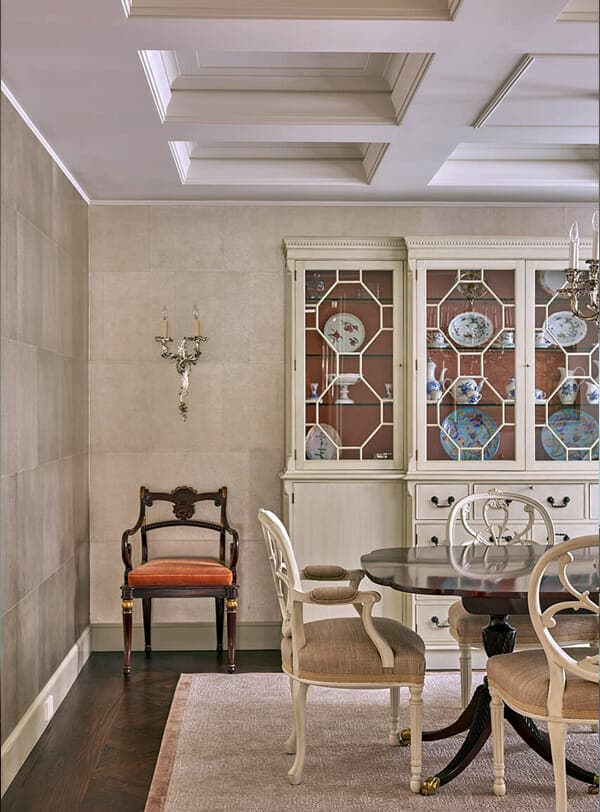
Hand-painted Gracie wallpaper in a bold orange red brings warmth to this Park Avenue dining room.
  • Bold colored furniture can be a unique way to incorporate jewel tones or intense colors. In every furnishing style, there are options that can bring bold colors to the space – painted wood or upholstery. Adding a deep or contrasting color to the inside of open cabinets adds extra impact to special objects displayed in millwork.
How to Make Bold Colors Work in a New York City Apartment 2 | Rodman Paul Architects
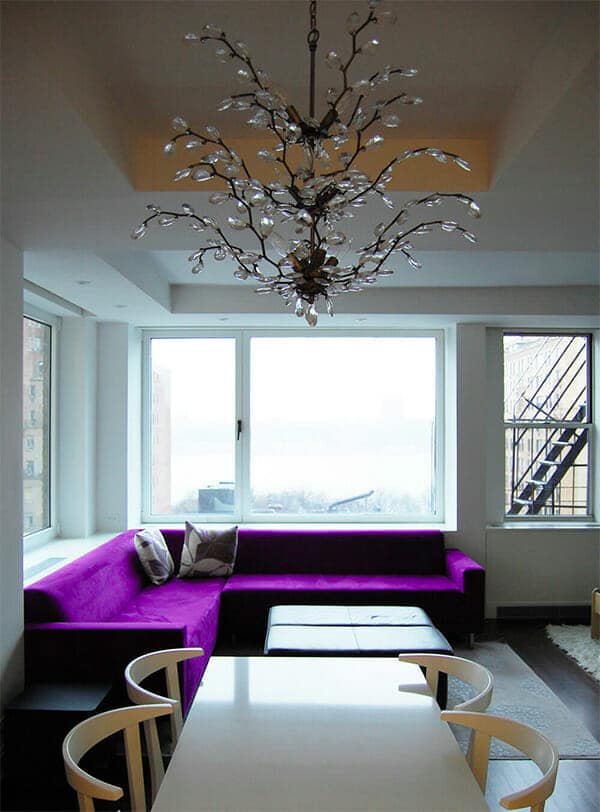
A violet couch creates a bold statement in a West Side apartment.
  • Before making final decisions, make big samples (2’ x 2’) on masonite or foam core and look at them in several locations in the actual space in both day light and artificial light.
  • Sheen impacts the richness of colors – matte paints look gauzy and lighter, shiny or gloss paints tend to be a bit deeper in color. Be sure to carefully inspect your surfaces before using gloss and high gloss: the glossier the finish the more it will show any imperfections in the wall surface.